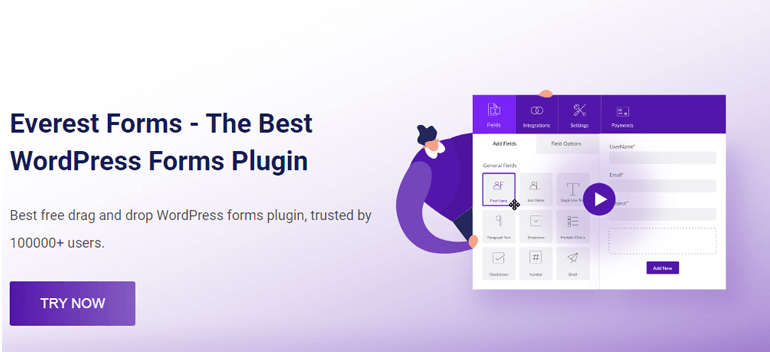
Wondering how to create a request a quote form in WordPress? Then, this is the right article for you.
If you want to capture more leads and improve conversion to grow your business, you should provide your customers an easy way to request a quote for your products and services. And there cannot be a better option than adding a request a quote form on your WordPress website.
Hence in this article, we’ll give you a step-by-step guide on how to create quote form in WordPress.
Let’s begin with a brief overview on why you need to create a request a quote form first.
Why Create a Quote Form in WordPress?
A request a quote form enables your potential customer to request a quotation of your products and services with ease. Moreover, it helps to collect necessary information from customers that you’ll require to provide them with custom quotes.
As we all know, customers love to bargain while shopping. A quote form also opens the door to negotiate the price for the products and services. So, you can adjust the cost for your customers and ensure their satisfaction. This in turn, helps you retain customers and build loyalty.
In a nutshell, adding a quote request form streamlines the price quotation functionality on your WordPress website. Best of all, it provides opportunities to improve customer satisfaction and boost your sales.
With that said, let’s look at how you can create a request a quote form in WordPress.
How to Create Quote Form in WordPress?
Making a quote form in WordPress is as easy as a walk in a park. Especially, if you choose the right plugin and get a beginner-friendly guide like Everest Forms. Interested? Let’s begin right away.
Step 1: Choose the Best WordPress Request a Quote Form Plugin
First of all, you need to choose the right WordPress plugin to build a quote form for your site. There are quite a few add-to-quote plugins for this purpose. But, we’ve chosen Everest Forms for good reasons.
Firstly, this incredible contact form plugin is super easy to use with its drag and drop interface. And you can build unlimited forms like online booking forms, call back request forms, sign-up forms, etc.
Secondly, it comes with ready-to-import form templates, including a template for request a quote form.
Thirdly, if you’re stuck anywhere, you can browse through its documentation. Also, you can contact the friendly support team to get further help regarding the plugin.
Step 2: Install and Activate Everest Forms and Everest Forms Pro
Now that you know which plugin to use, it’s time to install and activate the plugin on your site.
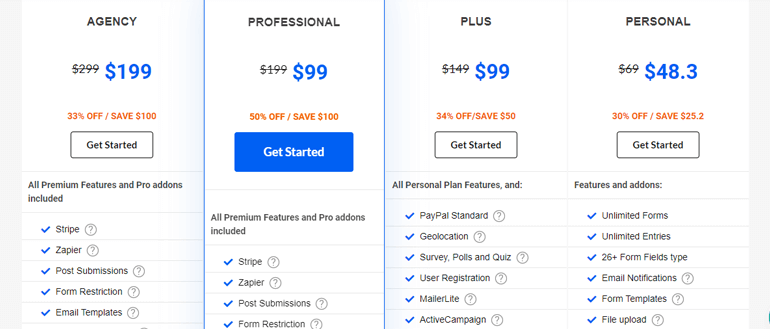
The template for the request a quote form is only available in the premium version of the Everest Forms plugin. The plugin offers the template in the Personal plan and above. This means you’ll need to purchase one of these premium plans to get access to the template.
You must install the free Everest Forms plugin and then install Everest Forms Pro on top of it. We have a detailed guide on installing and setting up the premium Everest Forms plugin. So, go through the steps and set up both the free and premium versions of the plugin on your site.
With that done, you can move on to the next step.
Step 3: Create and Customize a WordPress Request a Quote Form
And now, you’re all set to create and customize your quote form in WordPress. Everest Forms gives you the privilege to either import a pre-built form template or build a form from scratch. So, let’s explore both options, and then you can choose the method more convenient to you.
I. Import ‘Request a Quote Form’ with 1 Click and Configure
You don’t need to create a form from scratch if you don’t want to. Everest Forms offers several ready to import form templates that can be imported with a click. And luckily, there’s one for request a quote form as well.
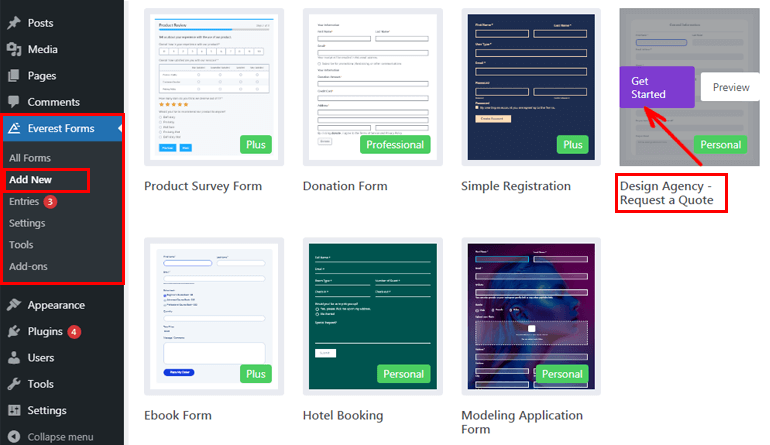
To import the template, make sure that you’ve purchased a premium version of the plugin. Then, from your dashboard, go to Everest Forms >> Add New. Next, search for the ‘Request a Quote’ form template, hover your cursor around it, and click on the Get Started button.
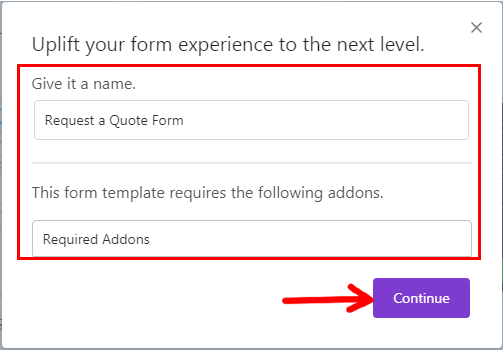
Then, you need to provide a suitable name for your form. Right below the name field, you’ll see the Required Addons that this form template needs. Once you hit the Continue button, the required add-on for the form template is activated automatically.
Now, the plugin takes you to the form editor window. Here, you can see that your request for a quote form is all set. So, you can instantly add it to your site.
However, this quote request form is specifically designed for a design agency. So, you can make small tweaks to this form template and make it suitable for your business type. It’s super-easy to add additional fields, re-order, or delete fields using Everest Forms’ intuitive drag and drop editor.
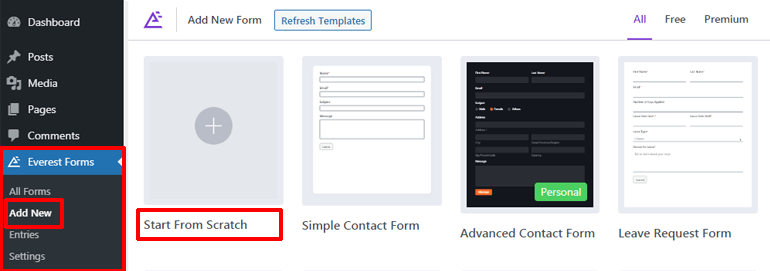
II. Create a Request a Quote Form from Scratch (Alternative method)
An alternative way to create a request a quote form is from scratch. Creating a form from scratch may comparatively take a little more time and effort from your side. Nevertheless, it’s worth that time and effort as you can build a quote request form specific to your requirement.
To create a form from scratch, go to Everest Forms >> Add New and click on Start From Scratch.
After that, name your form and hit on the Continue button.
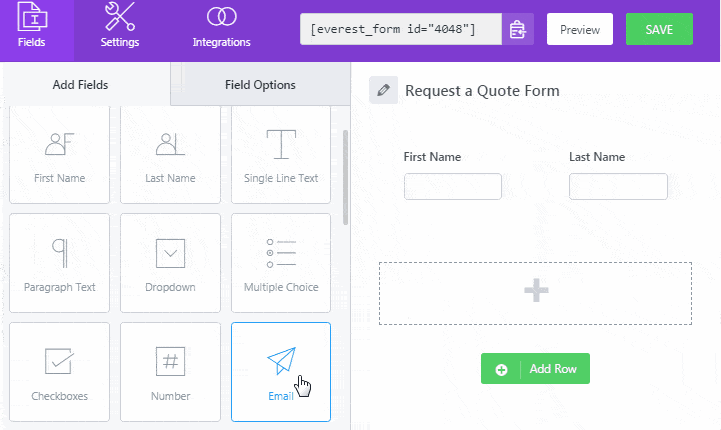
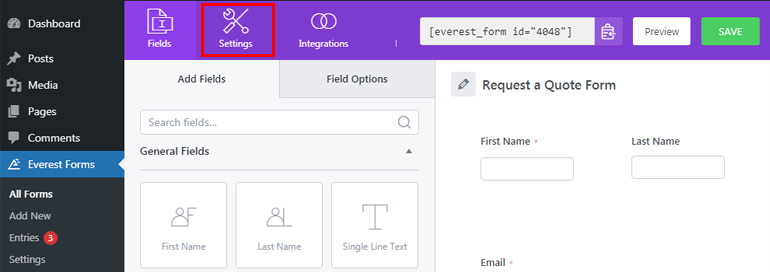
i. Add Required Form Fields
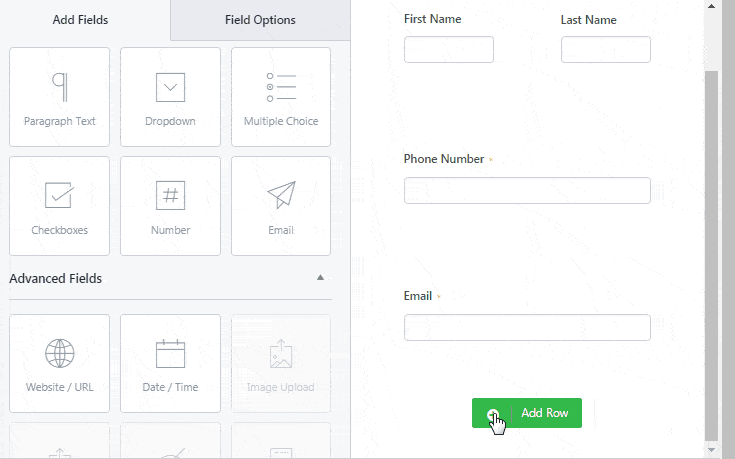
With Everest Forms, you can add as many form fields as you want without any limitations. You can drag the required fields from the left-hand side and drop them to the right-hand side to get your form ready in no time.
The form fields available in Everest Forms Pro is categorized into four sections which are as follows:
- General Fields
- Advanced Fields
- Payment Fields
- Survey Fields
Thus, you’re sure to find all the form fields you require to build a complete quote form for your site. For instance, the commonly used fields for a quote form are name, email, phone number, date/time, multiple choice, dropdown, etc.
If you want to get detailed information about each form field, you can check out the documentation here.
Furthermore, you can choose the number of columns while adding a row for your form field. All you need to do is click on the Add Row button, hit on the Pencil icon, and select the row type. Then, you can add any form fields that you want.
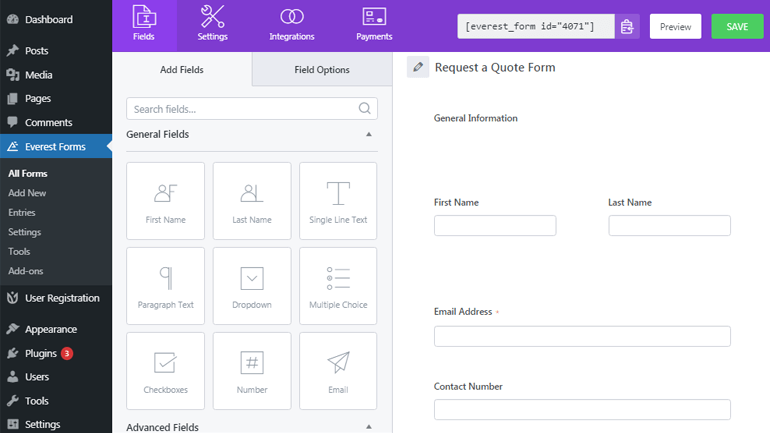
ii. Customize the Field Options
Now, click on the form field you want to customize. Its Field Options will appear on the left.
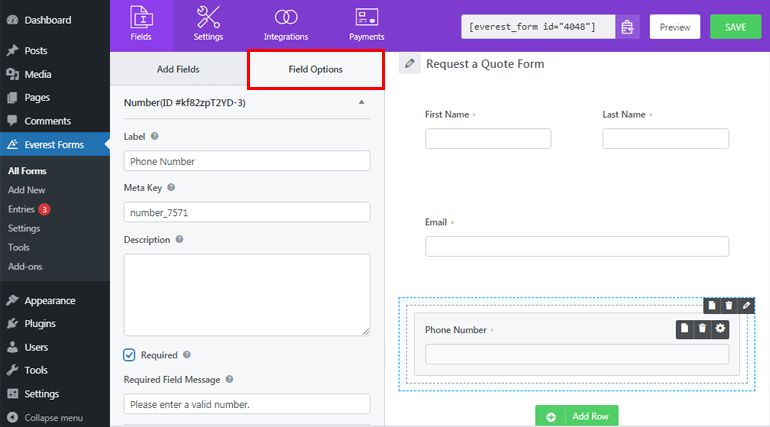
For every individual form field, you can add a label, meta key, and description. You can also make your field required. This means your users cannot proceed with the form without filling the field you’ve marked as compulsory. You can also enter the required field message.
Furthermore, the advanced option lets you add placeholder text, CSS classes, etc. Besides, you can also choose to enable or disable conditional logic, which we’ll be discussing in detail in our next section.
iii. Enable Conditional Logic
In simple words, conditional logic means adding a condition to show the form field option to the users. You choose to show or hide the particular field based on previous answers given by users. Hence, you’ll be able to create a form that isn’t too long without missing necessary information from your users.
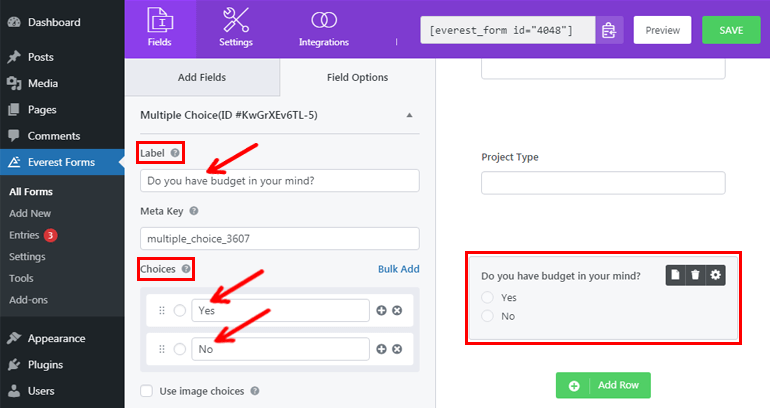
Here’s an example to make it clear. Let’s say that you want to ask if your users have a budget in mind. Now, they can answer either yes or no. If the answer is yes, you might want to know about their budget expectations for the project.
So, to set the conditional logic, add a Multiple Choice field to your form at first. After that, click on the field to customize your field options. Add a label as Do you have a budget in your mind? and add the choices as Yes and No.
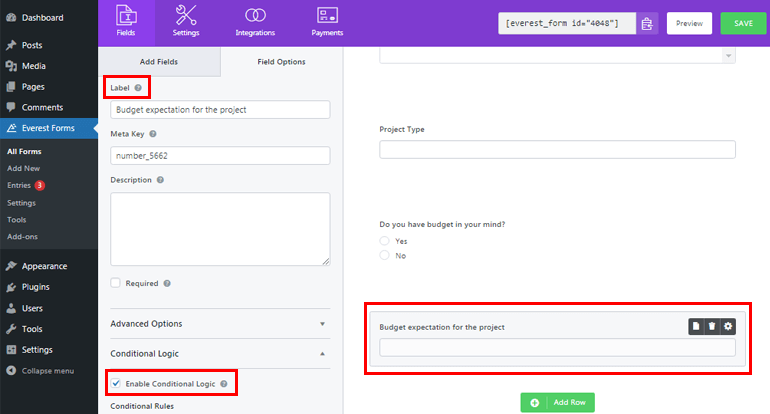
Again, add a Single Line Text field and click on the field to make edits. Next, label the field as a Budget expectation for the project. After that, scroll down and Enable Conditional Logic.
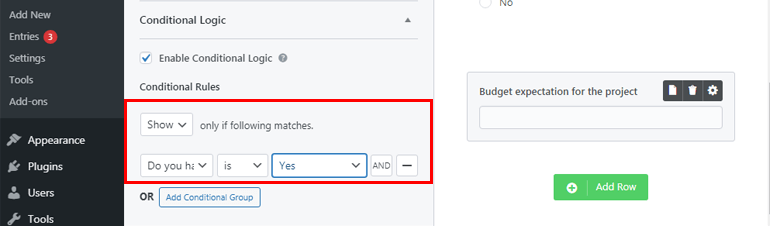
Now, click on Show this field if Do you have a budget in your mind? is Yes and save it. If your users choose the option as Yes for the question, it’ll display the additional field Budget expectation for the project. On the contrary, it won’t display if they choose the answer as No.
Finally, don’t forget to click the SAVE button to save all your form settings. Not to mention, you also get an option to Preview your form to see how it looks from the frontend.

Step 4: Configure the Settings of the Request a Quote WordPress Form
You’ve created a quote request form successfully. But, it’s incomplete until you configure the necessary settings for your form.
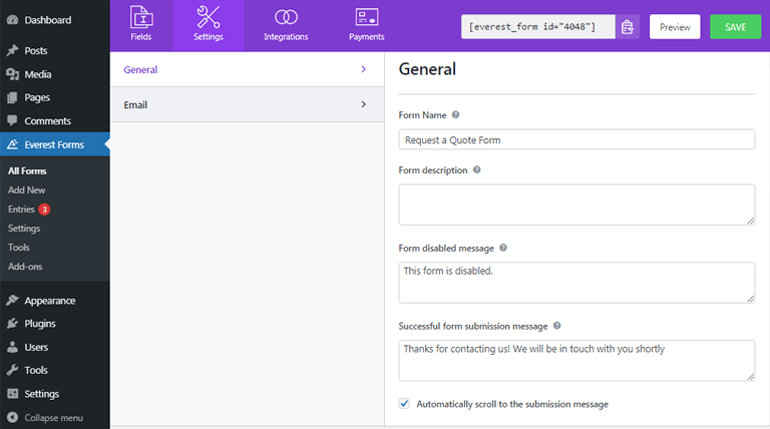
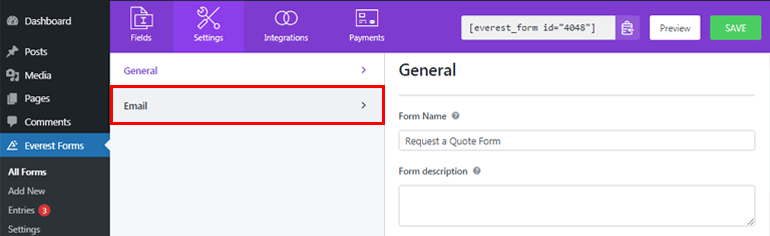
For this, click on the Settings tab at the top. Under this tab, you’ll find two sections: General and Email. Now, you can configure the different form settings under these tabs.
I. Configure General Settings
Under the General section, you can configure all the general settings for your request a quote form. Here, you can edit the form’s name and description. You can also display a short message whenever the form is disabled or submitted successfully.
Further, with the Redirect To option, you can make your users land on the page or URLs of your interest. You also get an option to choose from the two layout design or enter the CSS class to select your own form wrapper.
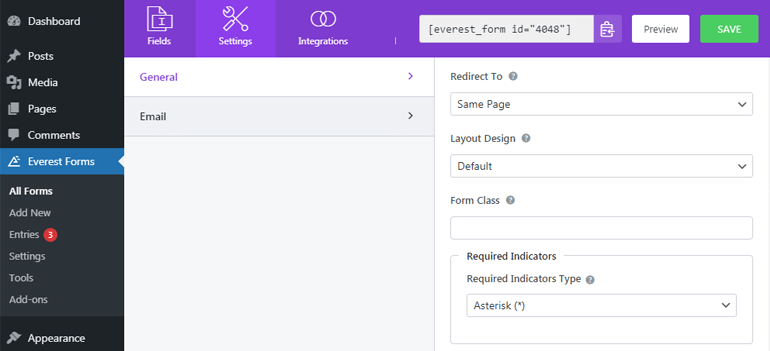
Apart from that, you’re able to edit submit button text, processing text, and more. Besides, you can enable or disable ajax form submission and storage of entry information. You can also enable anti-spam honeypot to block form spam.

After the necessary form configuration, don’t forget to hit the SAVE button at the top to save all your settings.
II. Configure Email Notifications
Under the Email section, you can configure the email notifications. So whenever users submit a new form, you’ll get a notification via email.
First of all, click on the Email tab and toggle on the Email button if it isn’t on. Now, add the email address where you want the notification to be delivered in the To Address field. Since we’re setting an admin notification, you need to add the admin email here.
Even better, you can utilize the smart tags (that are set up by default) to grab the admin’s email automatically.

From Name option allows you to add the name of the user who submitted the form. It’s possible to capture your user’s name automatically using smart tags. But make sure that you mark the name field as required, or else if your users leave it empty, you won’t be able to grab the name.
Likewise, From Address lets you add the email from where quote request forms are sent to the users. So, you can add the admin email address here.
In the Reply To option, add the respective email address where you would like to reply to a message. Basically, as an admin, you’ll be replying to your users who filled the form, so you can add smart tags here as well to get the email address of your users.
Similarly, you can also enter the Email Subject and Email Message. Not to mention, you can use the {all_fields} smart tag if you want to receive all the form field information filled up by your users. Moreover, you can enable conditional logic in your email.
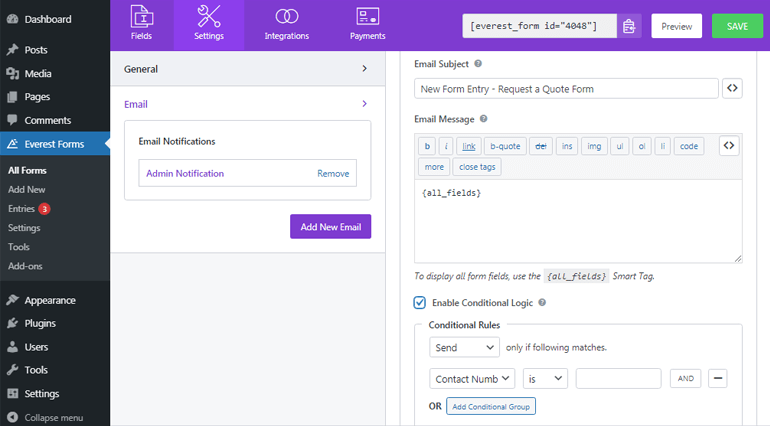
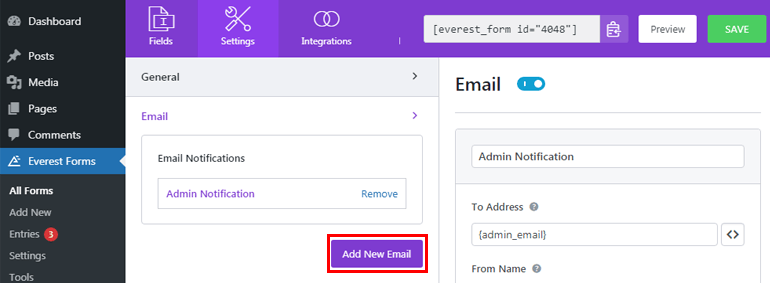
Everest Forms enables you to set unlimited email notifications. Thus, you can also send email confirmation to your users after form submission if required. Just click on the Add New Email button.
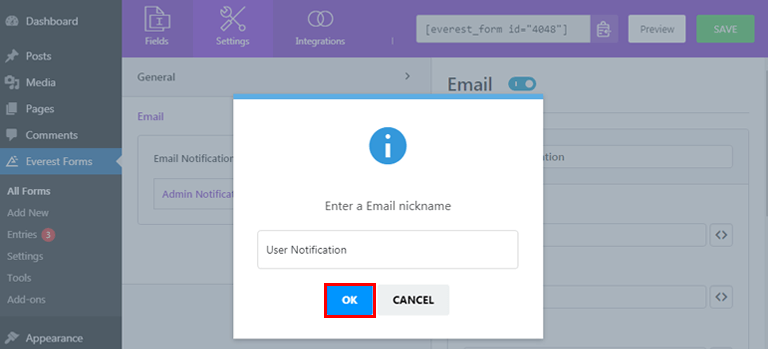
Provide a suitable nickname for your new email and click on the OK button. Now, you can configure the email settings as before.
Step 5: Publish the Request a Quote WordPress Form
We’re almost at the end of our tutorial on how to create a request a quote form in WordPress. Now, the only thing you need to do is to get your form published so that your users can see it, fill it, and submit it to you.
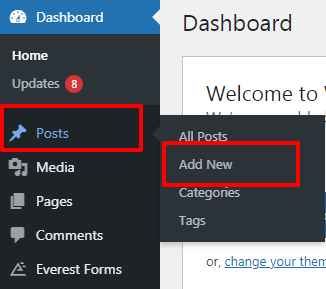
It’s possible to add your quote request form on pages, posts, or anywhere to your liking. For now, let’s get to know how to display it in your posts. So, from your dashboard, go to Posts >> Add New.
After that, press the Add block (+) button at the top, search for the Everest Forms block and click it.
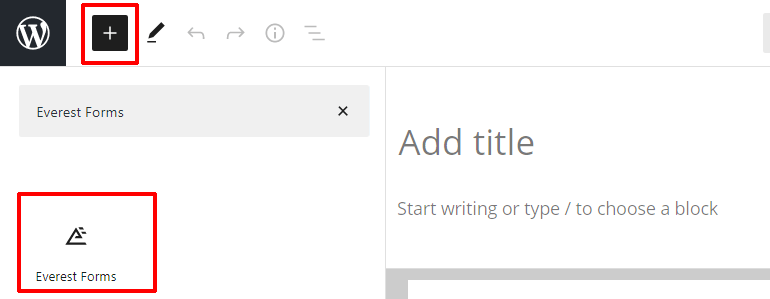
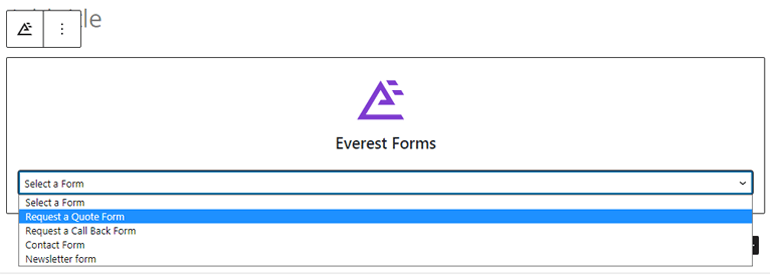
Now, press the dropdown menu and select the Request a Quote form you’ve created.
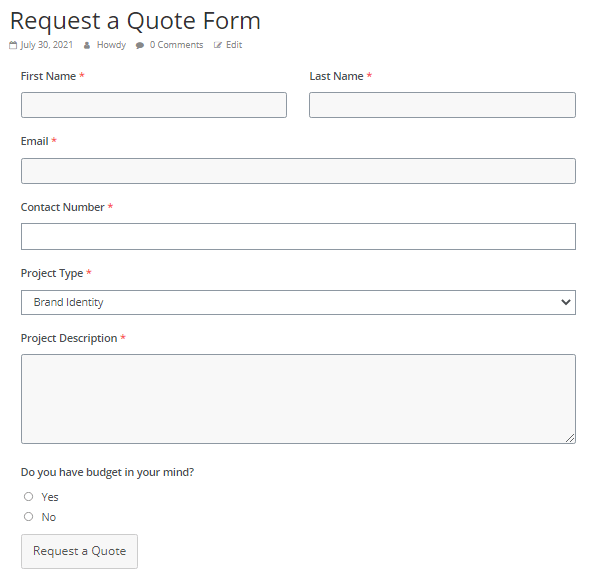
Add a suitable title to your form, and hit the Publish button. Your form looks something like this when viewed from the frontend.
There’s an alternative method to adding your form to the website as well. For this, go to Everest Forms >> All Forms and copy the shortcode of the required form.
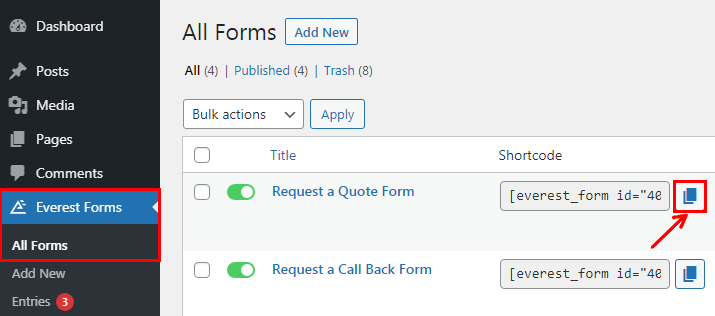
Now, paste the shortcode into a Shortcode block in the page or post of your choice. Finally, hit the Publish button.

View Your Request a Quote Form Entries
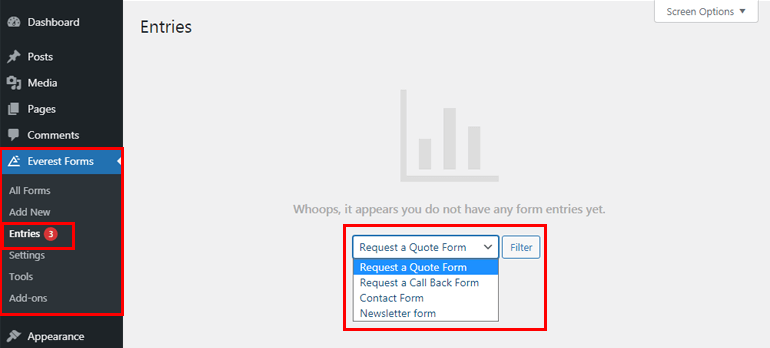
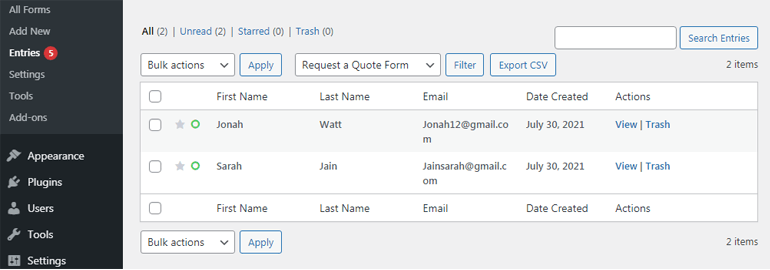
You can view all your form entries from your WordPress dashboard itself. To view the form submissions, go to Everest Forms >> Entries. Filter your form by name, and you’ll be able to see the total entries for your form.
You can manage all the form entries directly from here.
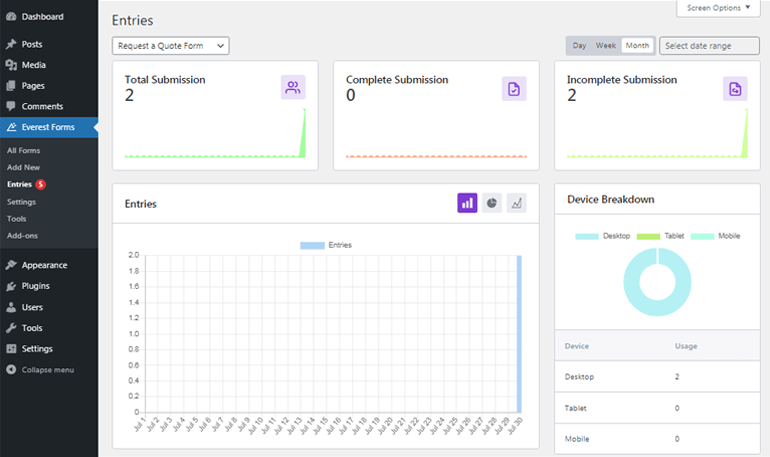
Further, with the premium Everest Forms, you can view your form entries data graphically. You get to see the Total Submission, Complete Submission, and Incomplete Submission at a glance. Also, you’re able to filter your form by month, week, and day. Moreover, it’s easy to find out which devices your users use the most to fill up the form.
Conclusion
And that’s pretty much it for our article on how to create a request a quote form in WordPress. With a magnificent form builder plugin like Everest Forms, creating and adding a quote form on your WordPress website shouldn’t be a problem.
With this plugin, you can use a pre-made quote form template or create one form scratch easily. All you need to do next is simply customize the form fields and form settings. Super convenient, isn’t it?
However, don’t stop here. If you’re running a full-fledged website, you might need to create other forms as well. So, go though our blog for handy tutorials on making survey forms, donation forms, and job application forms.
Also, follow us on Twitter and Facebook for updates on new articles.


![Zakra 3.0 | Zakra Pro 2.0 Release [Major Updates!]](jpg/maxresdefault-3.jpg)
Hello.You have created a website, but it is not attractive to visitors.Maybe you need help?To get started, you need a good template. Templates can be found here – https://assist-hub.com/wordpress-themesHelp with setting up WordPress, writing content for the site, and SEO can be found here – https://assist-hub.com/fiverrPlugins will help you quickly set up your site, they can be found here – https://assist-hub.com/wordpress-pluginsHigh-quality images give your site a heartfelt touch, making it unforgettable. You can find them here – https://assist-hub.com/stock-imagesThis will help you start earning faster with the help of these sites.
How to Create Request a Quote Form in WordPress?
[url=http://www.gf51zqeompc160gg6302y22ni1fx5786s.org/]uehssbkezv[/url]
ehssbkezv http://www.gf51zqeompc160gg6302y22ni1fx5786s.org/
aehssbkezv
Planetary Gearhead 32mm
TH-G0202 Series
Planetary Gearhead 28mm
Network Switch
Switch Poe Reverse
http://www.egservice.com.ve
Planetary Gearhead 24mm
Bolt
Galvanised LHDG Zinc Aluminum Magnesium C Channel Steel
http://www.borisevo.myjino.ru
Balcony Folding Door
Pvc Toilet Door
Galvanised Steel Channel U Steel Beam C Channel Steel Bunnings
24×80 Accordion Door